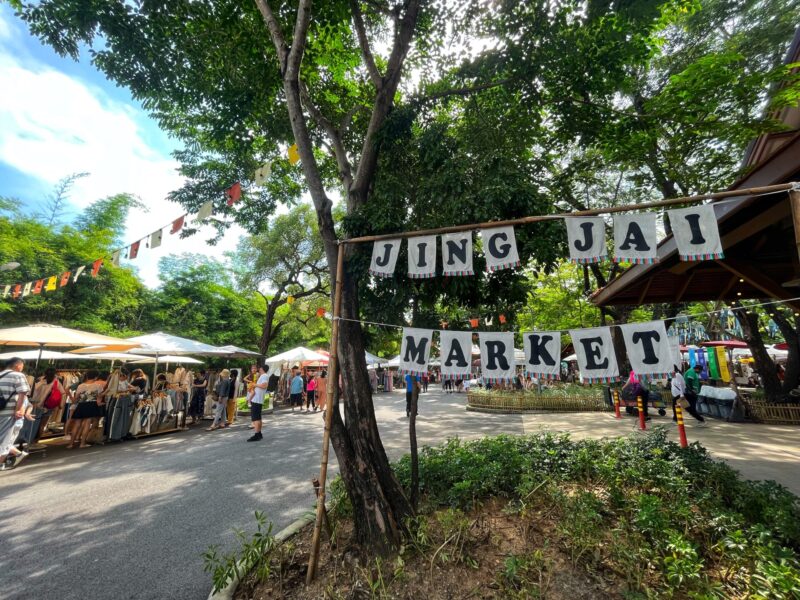
If your trip to Chiang Mai takes place over a weekend, we highly recommend a visit to the atmospheric JJ Market. It is a lively market to explore when visiting the city. Let’s discover Jing Jai Market with our comprehensive guide!
Jing Jai Market, commonly known as JJ Market is a lively open-air market in Chiang Mai. It is a great market that combines the farmer’s market, organic market, flea market, and creative craft market in the same area. There are plenty of goods and produce on sale. Locals sell healthy organic fruits, vegetables, and handmade handicrafts in the JJ market. You’ll hit the JJ Market where you can easily spend an hour or more here!
We visited Jing Jai Market during our visit to Chiang Mai. There are lots to see in the market and highly recommended. Continue reading our Jing Jai Market Guide to know more detail about the JJ market.
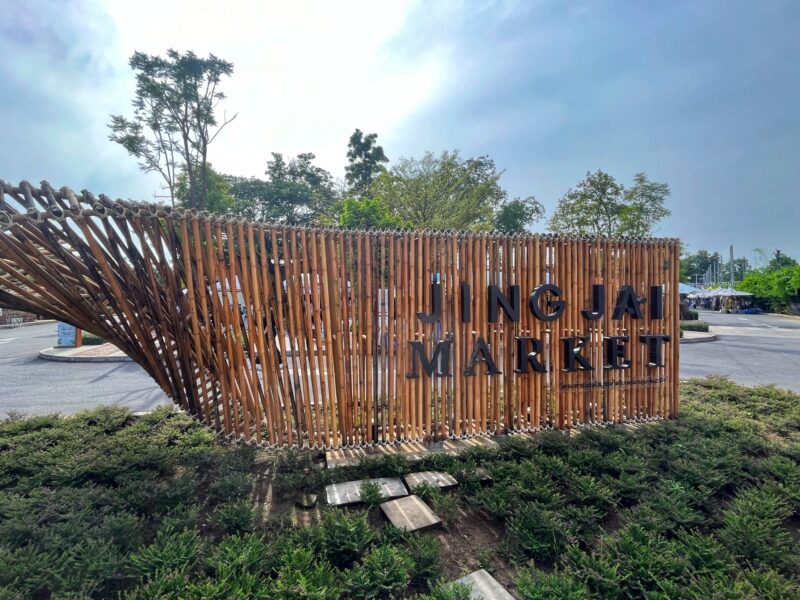
Guide to Jing Jai Market Chiang Mai
Jing Jai (JJ) Weekend Market is situated at north of Chiang Mai’s old town in the Chang Phueak area along the Atsadathdon road.
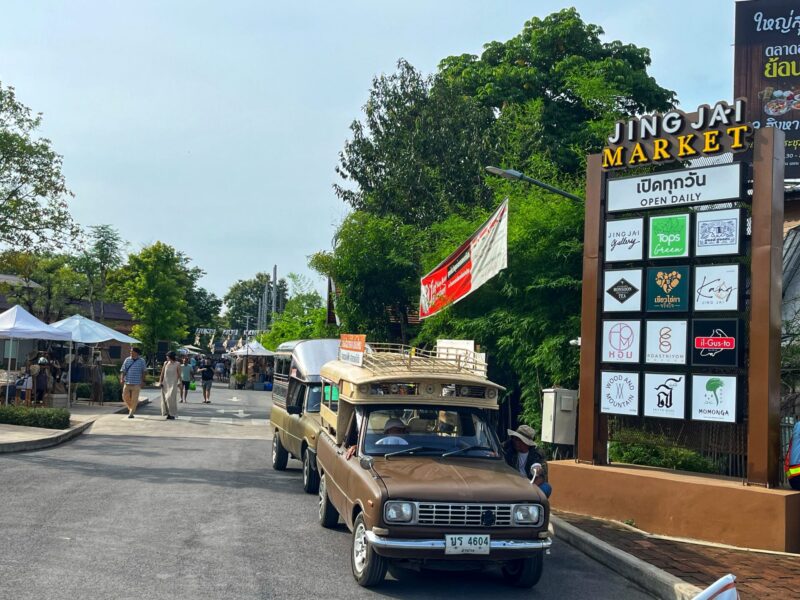
How To Get To Chiang Jai Market: It is located slightly outside the old town. From Chiang Mai’s old town, it is around a 20 to 25-minute walk from the North Chang Phuak gate. Alternatively, you could also take a tuk-tuk, or hail a Grab to get there comfortable.
When to visit Chiang Jai Market: Make sure you go on during weekend early! Although JJ Market is open daily, the market is particularly lively on Saturday and Sunday mornings. You’ll have a great opportunity to stroll through the market, enjoy a cup of coffee, or sample some local food.
Jing Jai Market (JJ Market) Opening Hours: 6.00 to 13:00 every Saturday and Sunday. Location: Atsadathon Road, near Kham Thiang Flower Market and Tesco Lotus.
Here is some of the quick Jing Jai Market guide if you are planning a visit to JJ Market:
What time does the Jing Jai market open?
JJ Market is a weekend morning market, opening from 7:00 to 13:00 every Saturday and Sunday.
What is the best time to visit JJ Market?
It is best to visit the JJ market in the early morning to avoid the crowd. We advise reaching there before 9:00 on the weekend morning.
What’s so special about Jing Jai Market?
The Jing Jai Market is fabulous with local food, clothing, crafts, and many more interesting things. There are also many handmade and local design handicrafts and clothes on sale here.
Our Trip To JJ Market
We visited Jing Jai Market during our visit to Chiang Mai. The market is open at around 6:30 morning and we arrived around 8:30 from our hotel from Nimman by Grab. There are started filled with people but not too crowded. We can wander from one stall to another stall for shopping. A great start to the day!
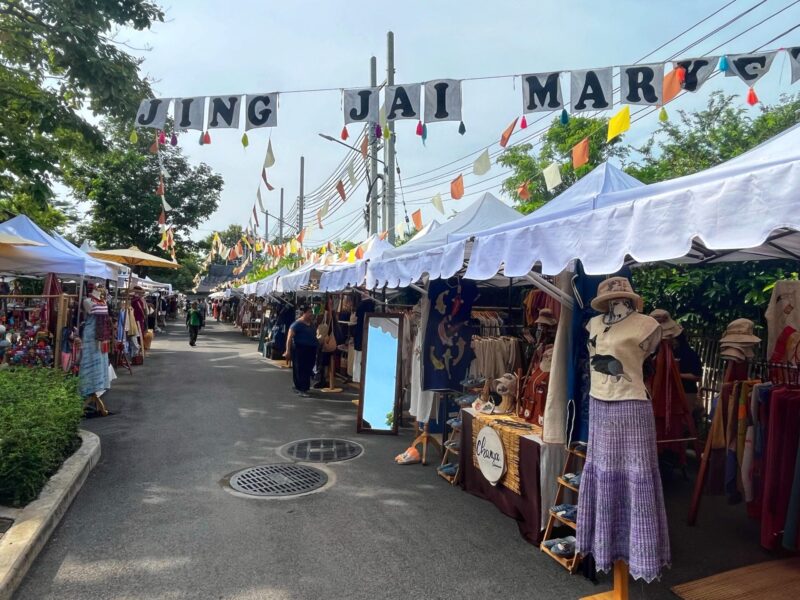
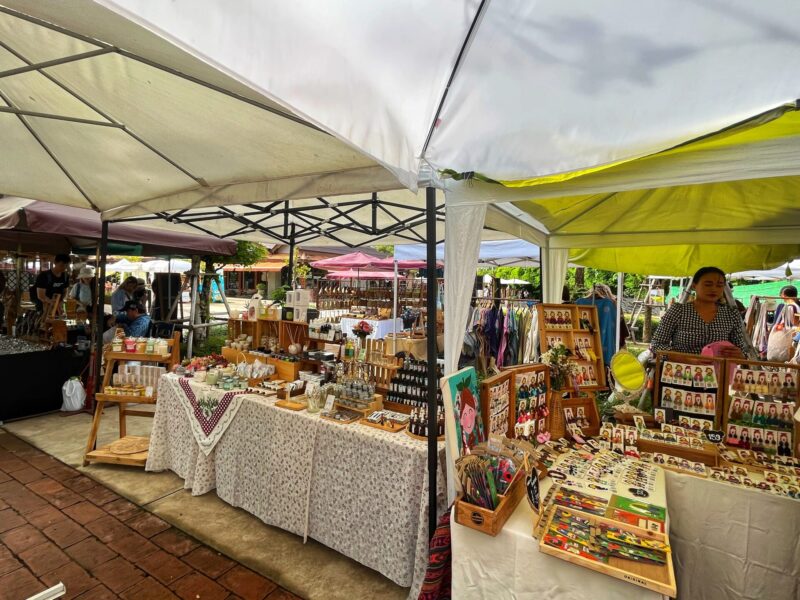
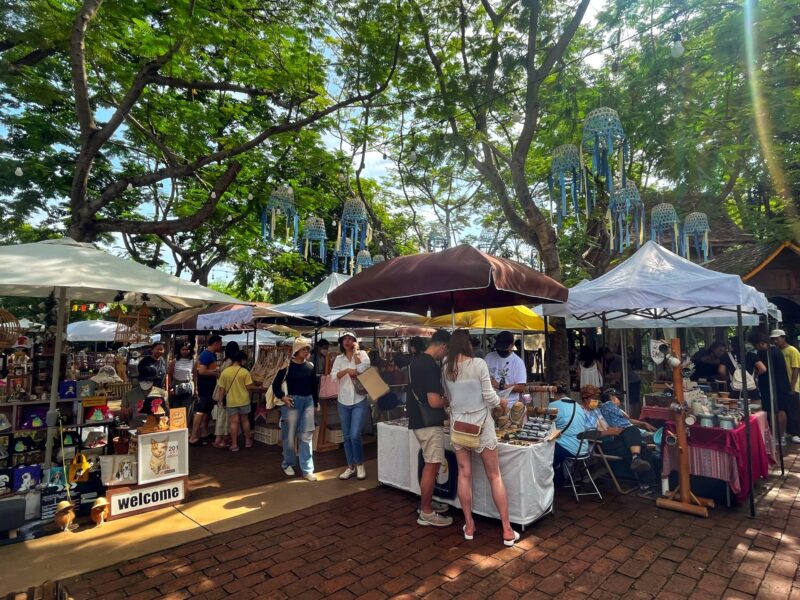
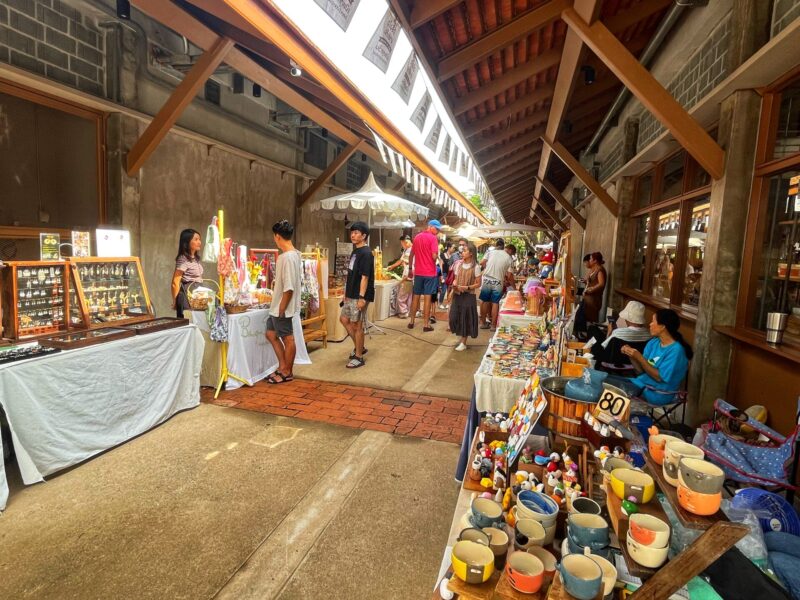
Fashion and Craft stalls
Once you first arrive, the first section you’ll encounter at Jing Jai Market is an area of boutique and independent craft stalls.
A place where you can lose yourself among handicrafts such as handbags, sculptures, paintings, and earrings, and where you can buy the best souvenirs of your Chiang Mai trip.
Make sure you allow plenty of time on the day you arrive at JJ Market to do some shopping. The JJ Market offers a great mix of souvenir stalls, fashion stalls, and traditional art stalls.
Most of the stallholders seemed to be local or youngsters selling their own brands of fashion or design. Everything here is unique and mainly hand-made.
Whether you still need some souvenirs for friends and family back home, or you’re just looking to do a bit of shopping for yourself, you’re sure to find everything you need to complete your Chiang Mai shopping experience.
Meandering through the stalls is also a great way to immerse yourself in the local atmosphere!
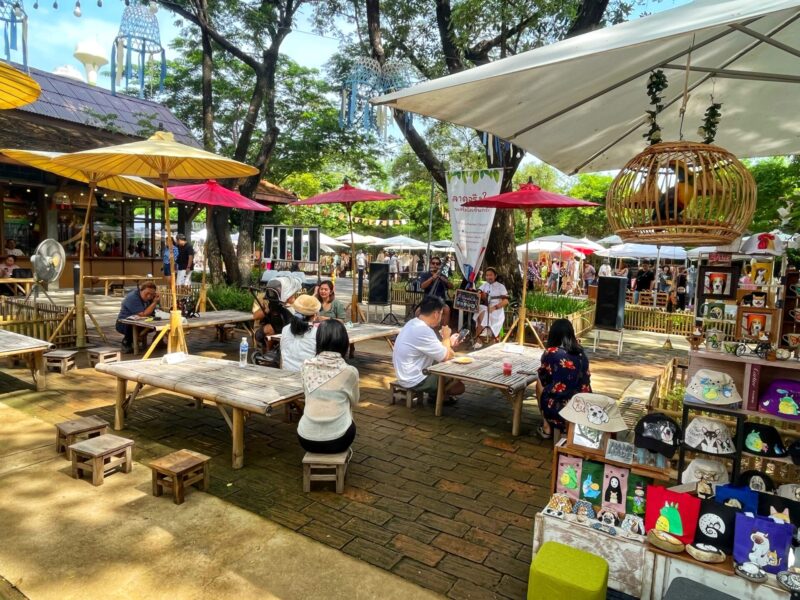
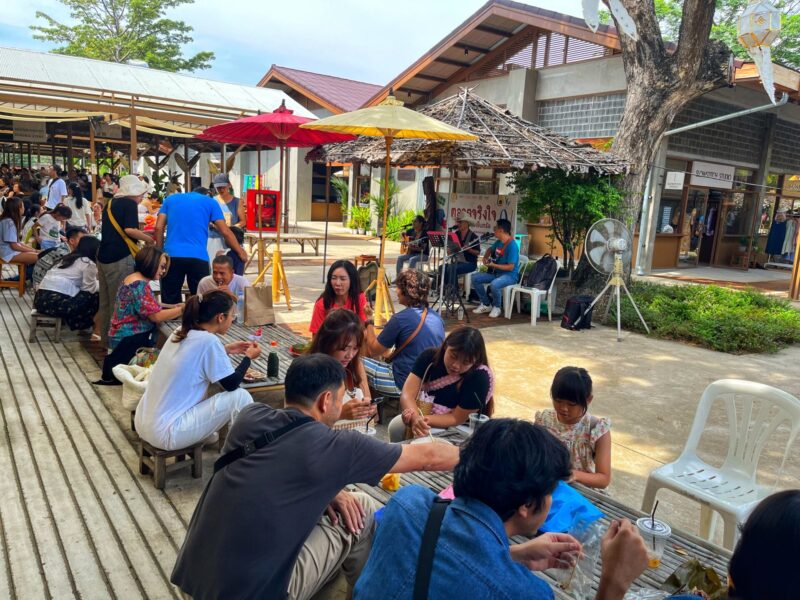
Live Music Performance
The popular morning market has lively energy, and the vendors and locals have a reputation for being very friendly.
The vibe is chic and cool with various local musicians singing and playing live instrumentals around the corner. You could also buy local food, and sit under the trees while enjoying the live music and beautiful songs.
A perfect place to spend Saturday or Sunday morning in Chiang Mai.
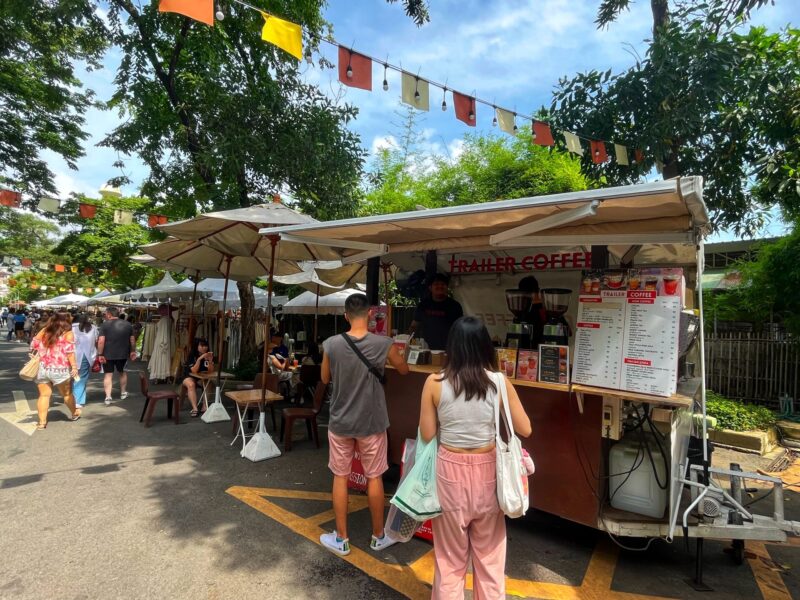
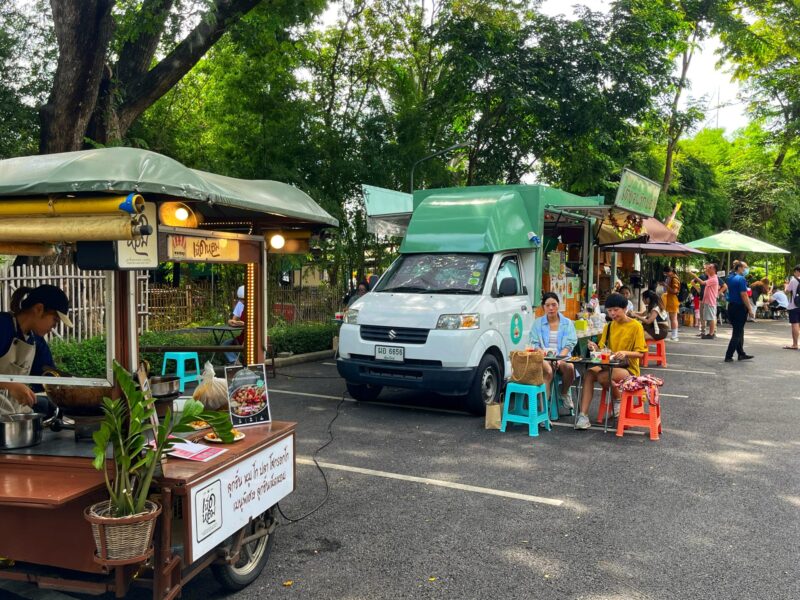
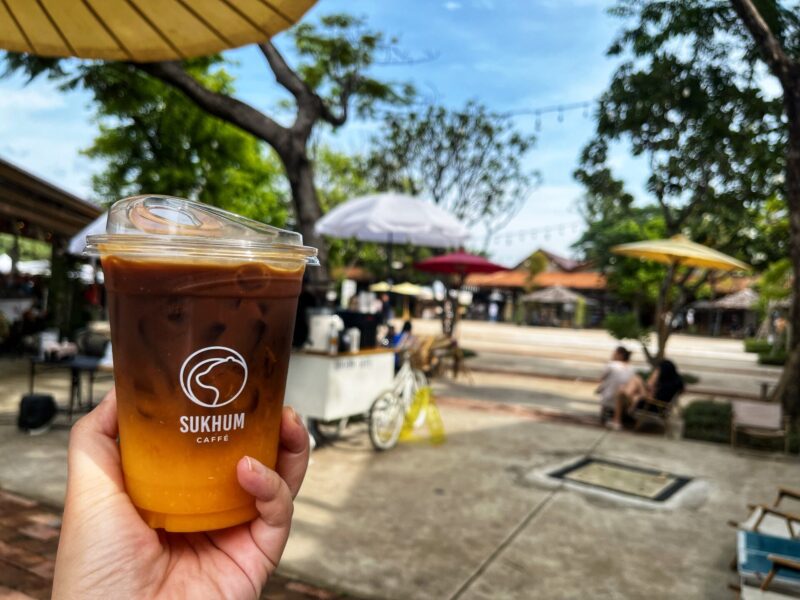
Coffee Shops and Coffee Trucks
There are several coffee shops open daily situated inside the JJ Market. Roastniyom coffee is one of the popular picks with great coffee and a wide range of sweet treats.
But if you continue to explore, you’ll see several mobile coffee trucks and carts scattered around the corner in the market.
Most of them are open just at the weekends for the farmers market.
Grab a coffee and sit down to enjoy it with the market vibe surrounding you!
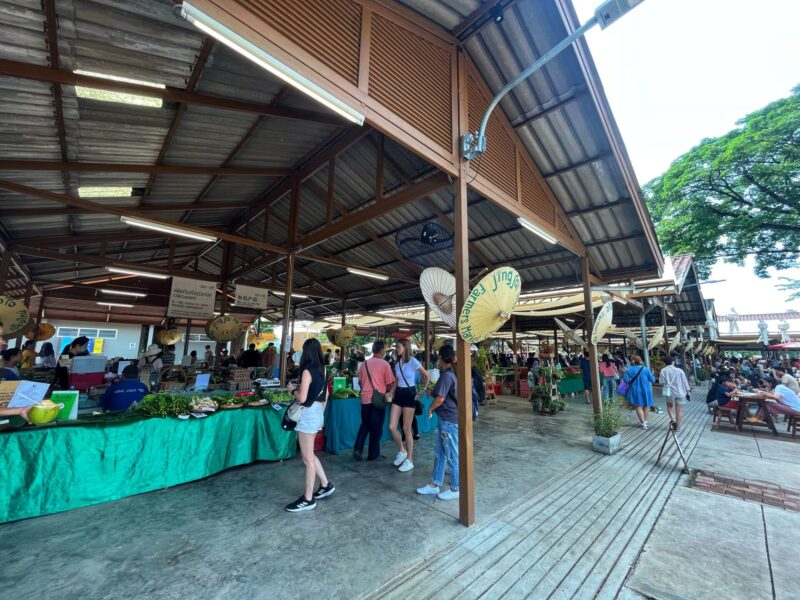
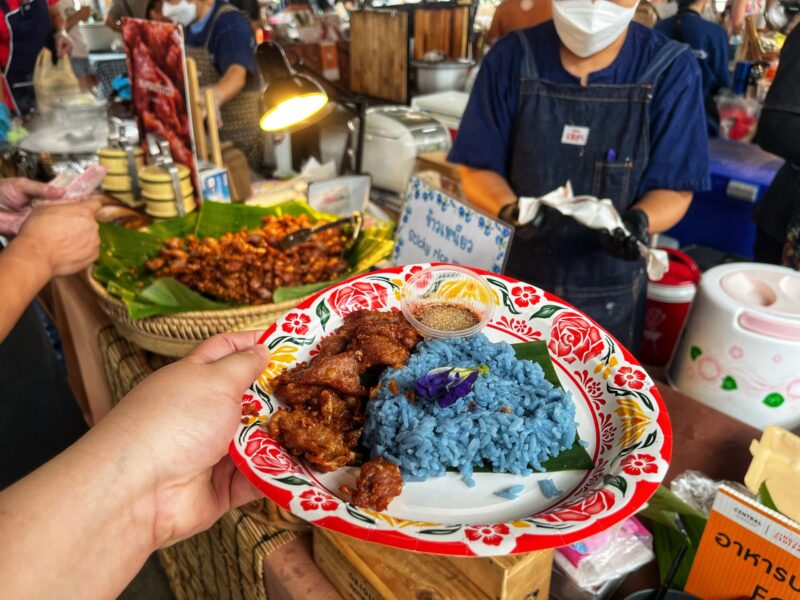
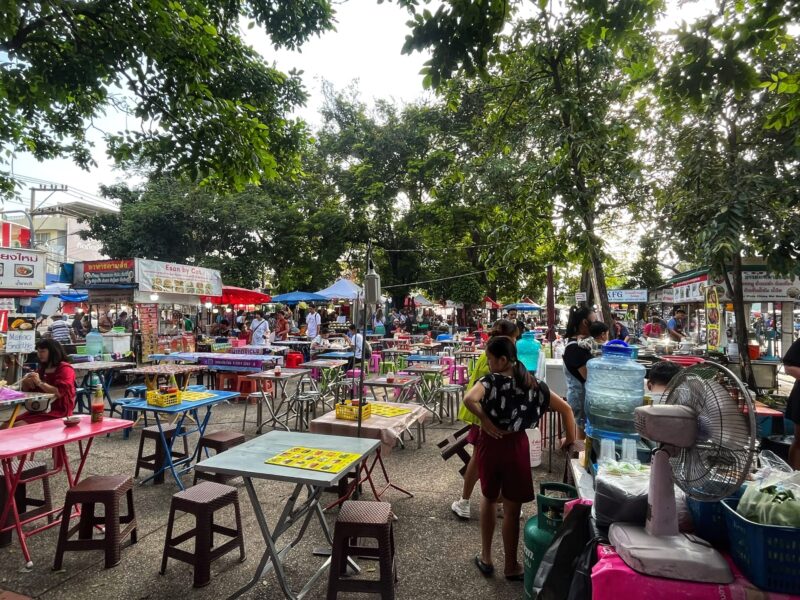
Jing Jai Farmer Market Food Stalls
Continue heading towards the center end of the Jing Jai Market, you’ll find the busy food courts and Farmer Market Section.
Starting around 6:00, the food stalls begin selling delicious hot meals and Northern Thai treats.
There is a wide range of food with lots of options including vegan and vegetarian. Among the most popular offerings are papaya salad, crispy pork, sticky rice, and all sorts of noodles dishes.
Hop from stall to stall until you get your fill of the best Northern Thai cuisine!
Jing Jai Market Travel Tips: Arrive early on an empty stomach as there is so much food to eat here!
The dining area set-up is really good with traditional or picnic tables all around the site. Adding the JJ market to your Chiang Mai trip is a great way to sample a wide variety of local food in one sitting.
Overall: A Trip to Jing Jai Market
All in all, we truly enjoy our trip to Jing Jai Market. We enjoyed swinging by the JJ Market while this authentic market is bustling. The market is well-organized, clean, and spacious. What I liked is that it was not a crowded market like night bazaar or Saturday walking market. We bought some souvenirs there and had a delicious local breakfast.
A great place to visit in Chiang Mai!
Did you enjoy this travel guide blog to Jing Jai Market Chiang Mai? We have more Thailand travel stories to share for your holiday. Free feel to check it out.
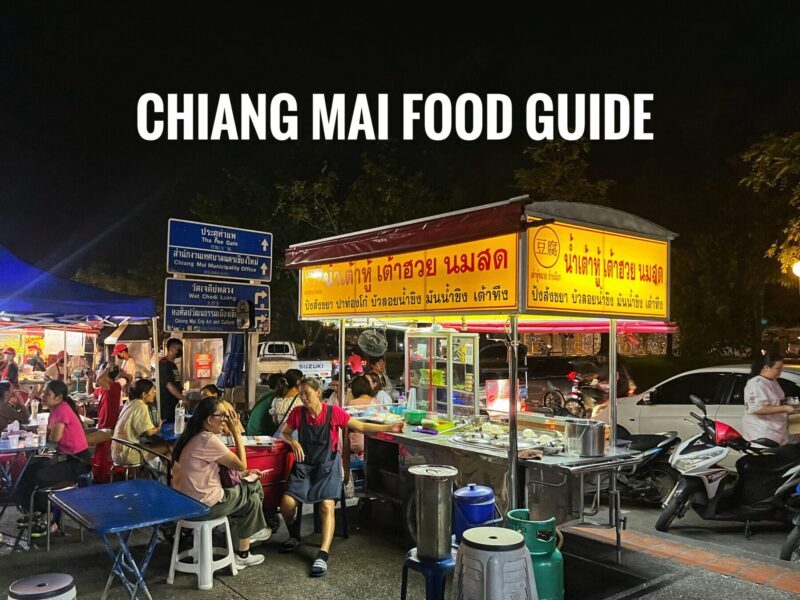
To start your Chiang Mai culinary expedition, we’ve created a list of must-eat food in this Chiang Mai food guide to find you where and what to eat in the city.
Exploring the Northern Thai food scene is for sure one of the best things to do in Chiang Mai. This popular tourist destination has a ton of mouthwatering food to eat. You’ll find affordable street food as well as upscale restaurants with Michelin stars when looking for where and what to eat in Chiang Mai. Don’t forget to taste as much as Northern Thai specialties like khao soi, nam prik, and sai oua in Chiang Mai!
During our visit to Chiang Mai, we spent some time finding the best street food stalls, tastiest restaurants, and trendy cafes in the city had offer. The food from Chiang Mai is truly unrivalled and we enjoy it so much!
Here’s the Chiang Mai food guide with a list of the best restaurants and street food stalls to eat in the city. The dishes listed below are some of the best local foods to try in Chiang Mai. Use this as a guide to savoring all the Chiang Mai authentic local dishes!
Chiang Mai Food Guide
Where and What To Eat in Chiang Mai
Chiang Mai is a food paradise for foodies to check out. There are so many food options available that it’s impossible for you to try everything especially if you are visiting Chiang Mai for a few days. Taste is subjective so we won’t always agree.
In this Chiang Mai Food Guide, we will recommend some of the best restaurants in Chiang Mai to try on when you’re planning a food trip there. You can also read further on specific Chiang Mai food review information about that restaurant.
Chiang Mai Food Guide – What and where to eat in Chiang Mai:
Khao Soi (Chiang Mai noodles) – Khao Soi Maesai, Khao Soi Khun Yai, Khao Soi Nimman, and more.
Sai Oua – Northern Thai Spiced Sausage
Nam Prik Ong / Nam Prik Noom – Thai Chili Dips
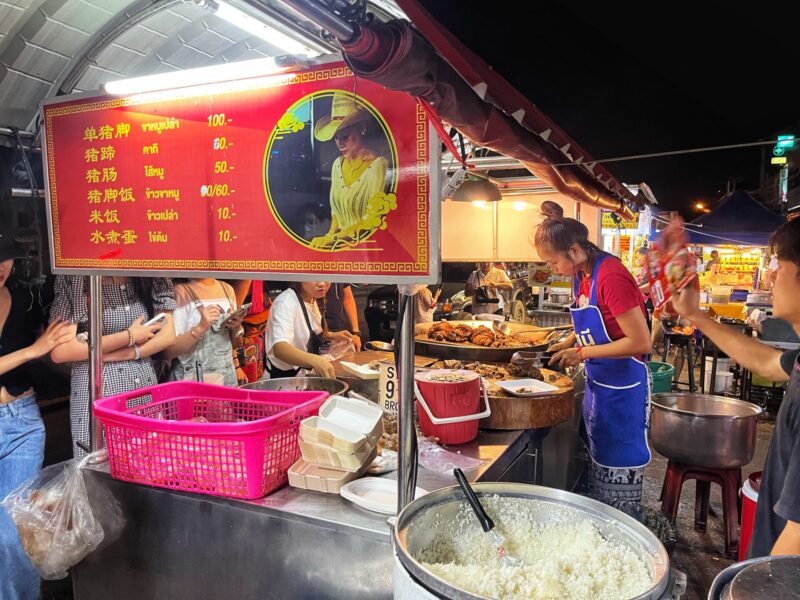
Khao Kha Moo Chang Phueak (Cowboy Hat Lady)
Suki Haeng Moo from Suki Koka
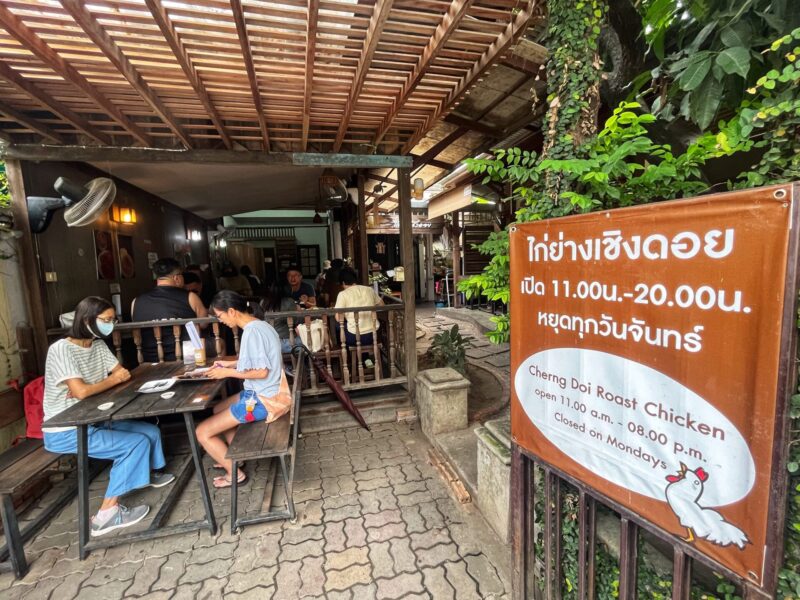
Kai Yang (Roast chicken) – Kai Yang Cherng Doi, SP Chicken
Nothern Thai Food Restaurant – Ginger Farm Restaurant, Huen Muan Jai, Kiew kai Ka, and more.
Chiang Mai Street Food
Coffee in Chiang Mai – Ristr8to, Graph Cafe.
Chiang Mai Food Tips: If you’re visiting Chiang Mai and want to learn about Northern Thai food, then you may be interested in joining a food tour or taking a cooking class. You’ll learn about Thai food culture while enjoying loads of delicious local foods to try. A highly recommended experience to explore popular Chiang Mai food.
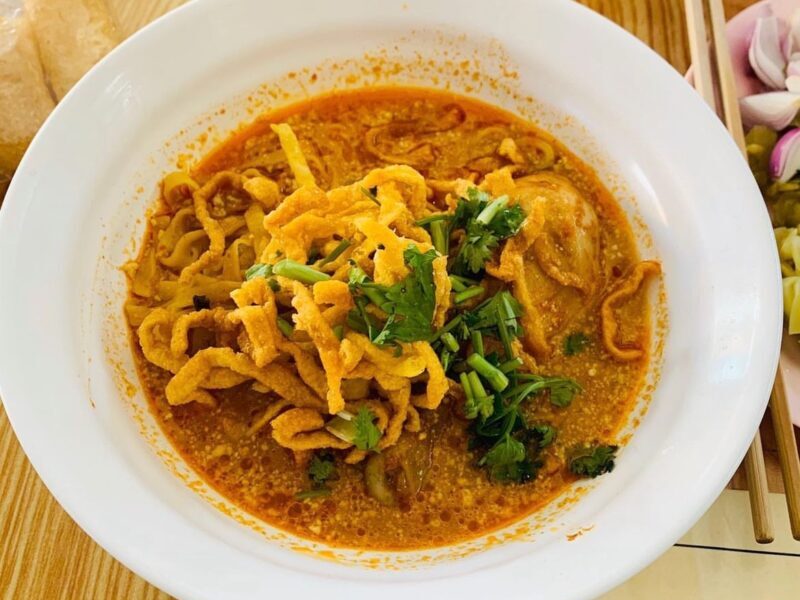
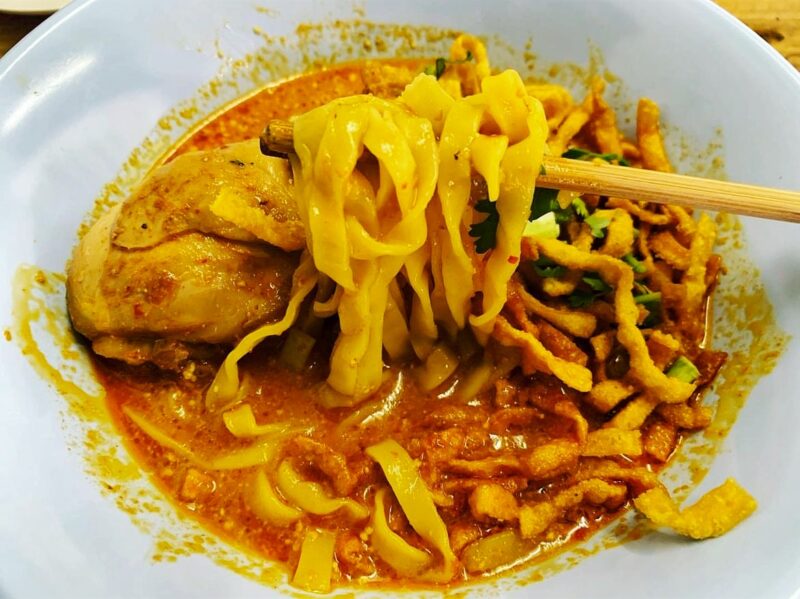
Khao Soi
Best Khao Soi in Chiang Mai – Khao Soi Maesai
Khao soi, or khao soy, is an iconic Northern Thai dish that must-try for everyone Chiang Mai food guide! It’s a simple yet satisfying noodle dish where crispy and soft egg noodles are served in a creamy, curry-like sauce made with coconut milk, and topped with crispy noodle shreds.
Khao soi is typically served with chicken or beef but some restaurants offer versions with pork, shrimp, or fish as well. The bowl usually comes with a side of chopped red onions, pickled cabbage, and a wedge of lime.
Where to eat best Khao Soi in Chiang Mai
Khao Soi Khun Yai serves the tastiest khao soi at a reasonable price. The noodles on top are crunchy and tasty while the coconut broth is creamy and not too sweet. Pick from chicken, beef, or pork. All are exceptions and delicious! It is a popular best to eat Khao Soi in Chiang Mai with queue always. The stall is open only from 10:00 to 14:00, so try to arrive early to avoid running out of food.
Khao Soi Maesai – Located in the Nimman area, the shop is said to serve some of the best khao soi in Chiang Mai. It is rewarded with the Michelin Bib Gourmand for continuous few years. The Khao Soi is served with hot and fresh ingredients are fresh. The egg noodles are crispy and the creamy coconutty broth is at the right amount of sweetness and spice. Its taste is so amazing. Pair it with a glass of Thai tea or Longan drink. Something to die for!
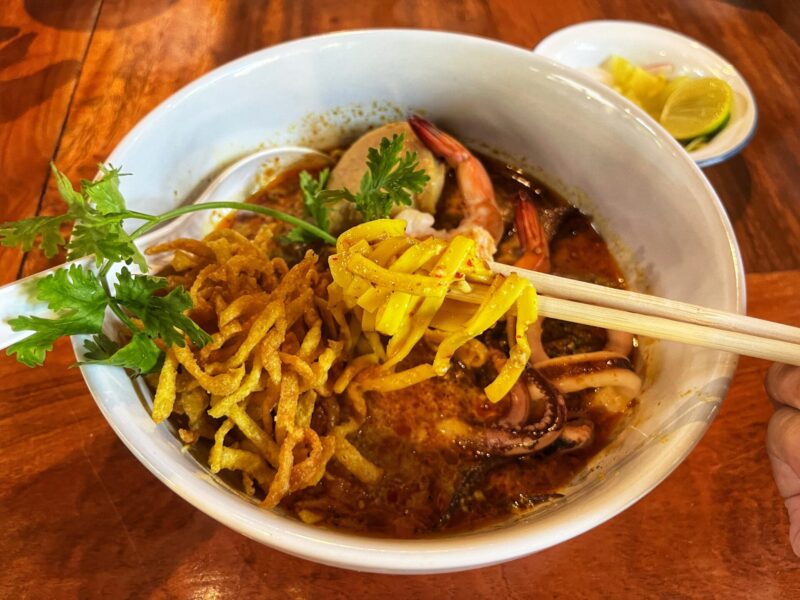
Seafood Khao Soi from Khao Soi Nimman
Khao Soi Nimman – Another popular Khao Soi restaurant in Chiang Mai Nimman area. The Khao Soi bowl is perfectly blending with both flavors and textures. We personally love their curry broth. It’s a perfect combination of creamy, spicy, sweet, sour, and hearty in the form of soup. It is wonderfully fragrant, even if it is quite mild. Highly recommended!
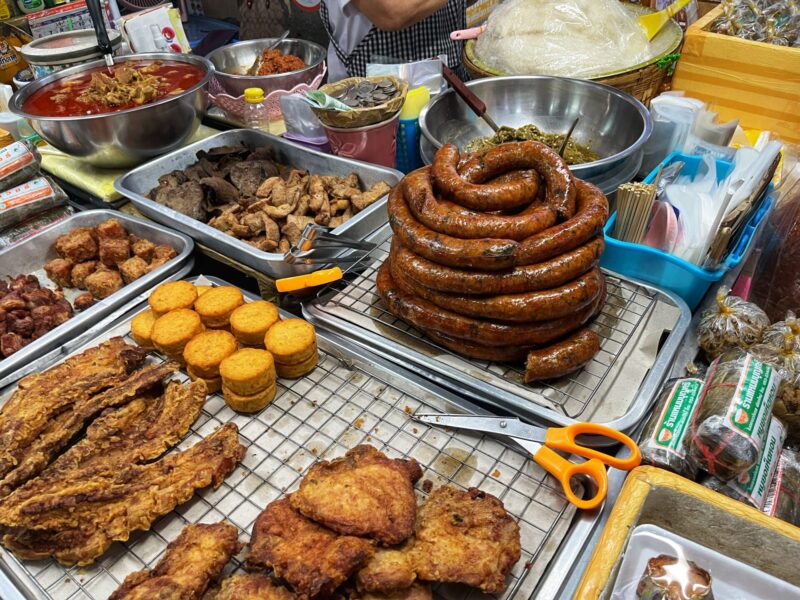
Sai Oua
Chiang Mai Food Guide – Sai Oua
Sai Oua, also called Sai ua is another must-eat in Chiang Mai. This famous Northern Thai spiced sausage is made with minced pork that beautiful blend of fresh herbs and spices like galangal, kaffir lime leaves, and lemongrass. The meat load is wrapped and full of flavor. Locals love to grill it, and eat it with sticky rice, or eaten as a snack and dipped with Thai dipped sauce.
Sai Oua is commonly found as an appetizer in Northern Thai restaurants and local markets.
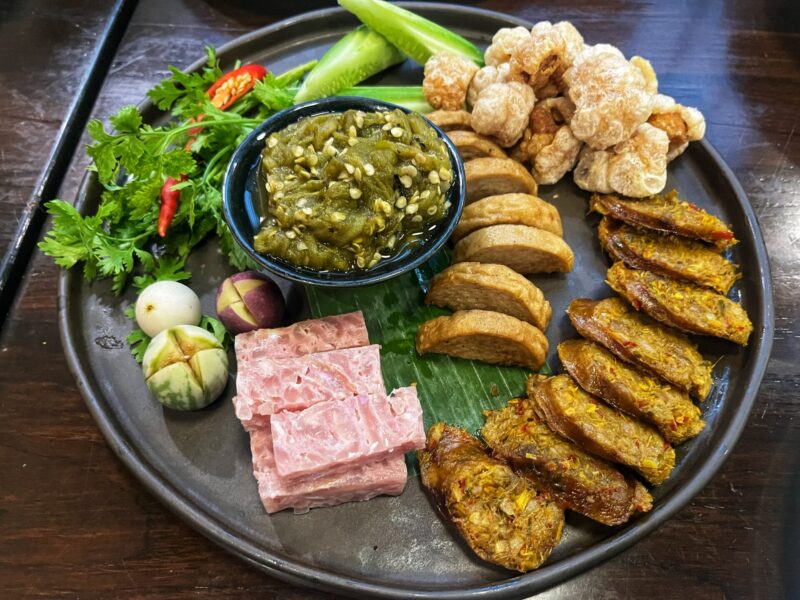
Nam Prik Ong / Nam Prik Noom
Chiang Mai Food Guide – Nam Prik (Thai Chili Dips)
Traditional Thai chili dips are commonly found in the North part of Thailand. You’ll find it almost on every dinner table or snack vendor across Chiang Mai. Dipped your food with Thai chili dipped such as Sai Oua (Thai sausage), kap moo (Thai crispy pork skin), pork ribs, sticky rice, and more.
There are two popular types of Thai Chili dip in Chiang Mai:
Nam Prik Ong – made of minced pork, stir-fried chilies, cherry tomatoes, shrimp paste, shallots, herbs, and fresh coriander. It is red but not very spicy. The taste is mild yet flavorful.
Nam Prik Noom – made of roasted green chilies, shallots, and garlic. It is green in color and rich in aroma. The taste is more hot and sour.
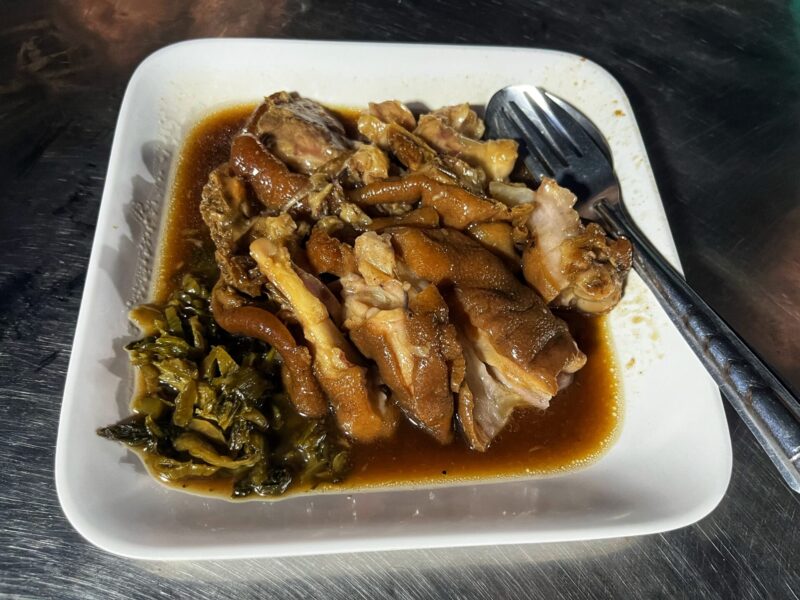
Khao Kha Moo Chang Phueak (Braised Pork Leg Rice)
Khao kha moo is braised pork leg cooked in Chinese five spice and served over rice with a medium-boiled egg. Even though this food is not an unique dish to eat in Ching Mai, Khao Kha Moo is also popular food to eat in Chiang Mai. The soft, silky skin covers tender meat bathed in a sweet, aromatic Chinese gravy.
Khao kha moo Chang Phueak is known for serving some of the best khao kha moo in Chiang Mai. It gained its popularity of the lady boss wearing a 10-gallon cowboy hat serving the food here. It even featured on one of Anthony Bourdain’s TV shows for the good food served. We recommended the must-try pork leg over rice served with a medium-boiled egg and Chinese broccoli. It’s not too sweet and incredibly tender. Absolutely delicious!
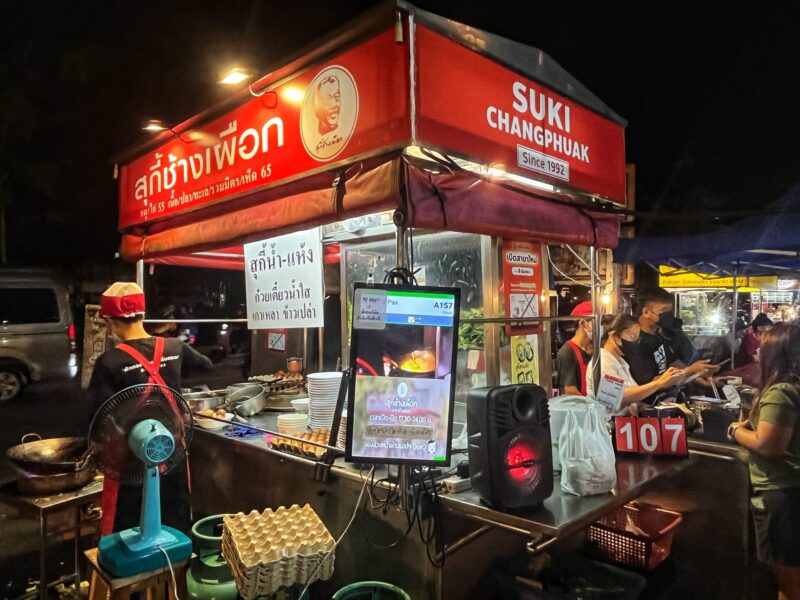
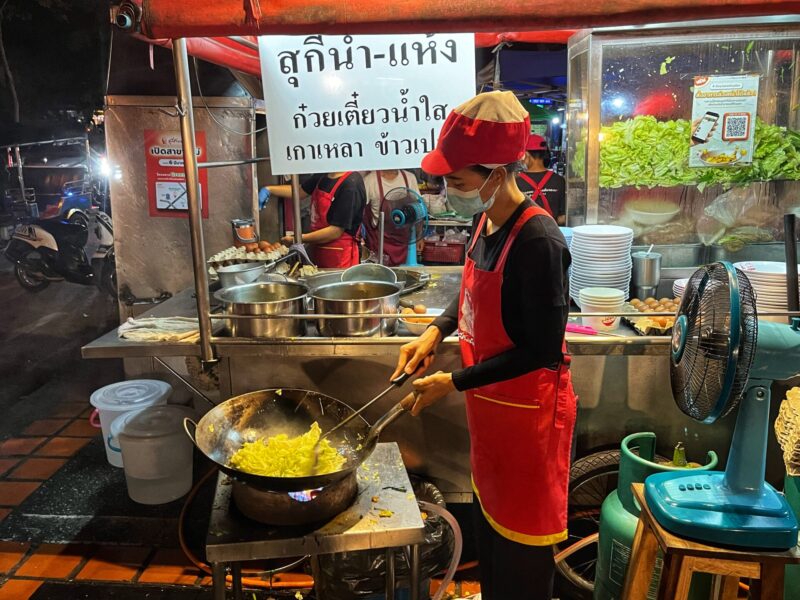
Thai Suki from Suki Koka
Sukiyaki is a well-known Japanese cuisine, and Thai people make it based on their version that satisfies their palates – Thai Suki Noodles.
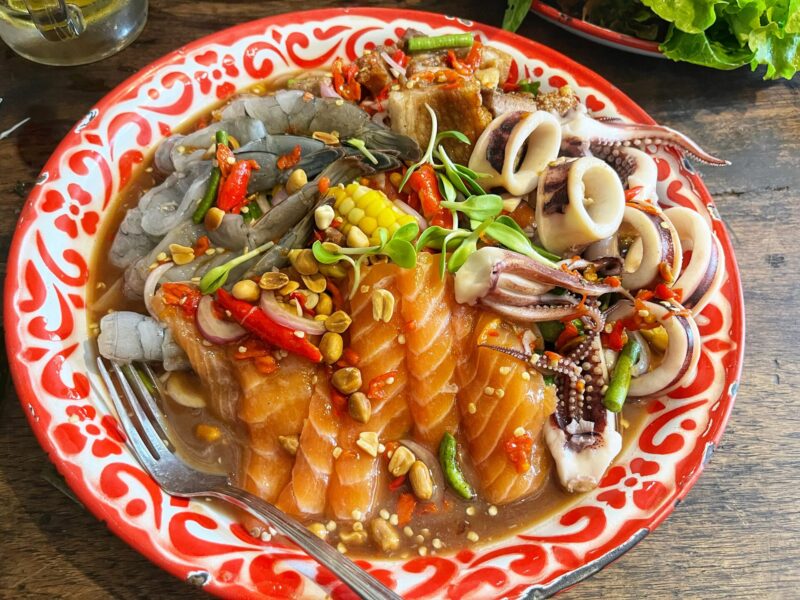
Thai Suki can be served as a soup (Suki Nam) or dry as a stir fry (Suki Haeng). Both use similar ingredients and it consists of vegetables cooked with mung bean noodles with a mix of seafood or your choice of meat. Most importantly, cooked with its signature red sauce – Thai sukiyaki sauce.
Located also at North Gate, beside Khao kha moo Chang Phueak, is another popular street vendor in Chiang Mai – Suki Koka. Suki Koka serves an amazing version of Thai suki haeng moo – a delicious vegetable and pork suki. It’s amazing watching the owner fried up their Thai suki in a wok at high heat so that the cabbage is cooked with a wonderful smokey wok hei flavor!
The food is very popular and often crowded, so it’s important to arrive early to avoid waiting.
Kai Yang (Roast Chicken)
Where to eat in Chiang Mai – Gai Yang Cherng Doi
Kai yang is a poultry dish made by slowly grilling over a low charcoal flame on whole marinated chicken. The meat is juicy with a satisfying crunch from the crispy skin from the slow grill. It is often eaten by accompanied som tam (green papaya salad) and sticky rice. This Isan dish is popular throughout Thailand and also the same in Chiang Mai. For the best Kai Yang in Chiang Mai, Cherng Doi and SP Chicken should be at the top of your list.
Gai Yang Cherng Doi is a Thai chicken restaurant specializing in slow-roasted chicken that is popular among locals and tourists. It’s often cited for being one of the best restaurants in Chiang Mai to have kai yang with Michelin’s Guide. The tender juicy meat is so succulent. Dipped it and eat with spicy sauce was a tasty experience hard to forget.
SP Chicken is a little Chiang Mai restaurant that serves incredibly tasty grilled chicken. The chicken have a fabulous taste and was crispy and succulent. It is also one of the Chiang Mai restaurants with a Bib Gourmand on Michelin.
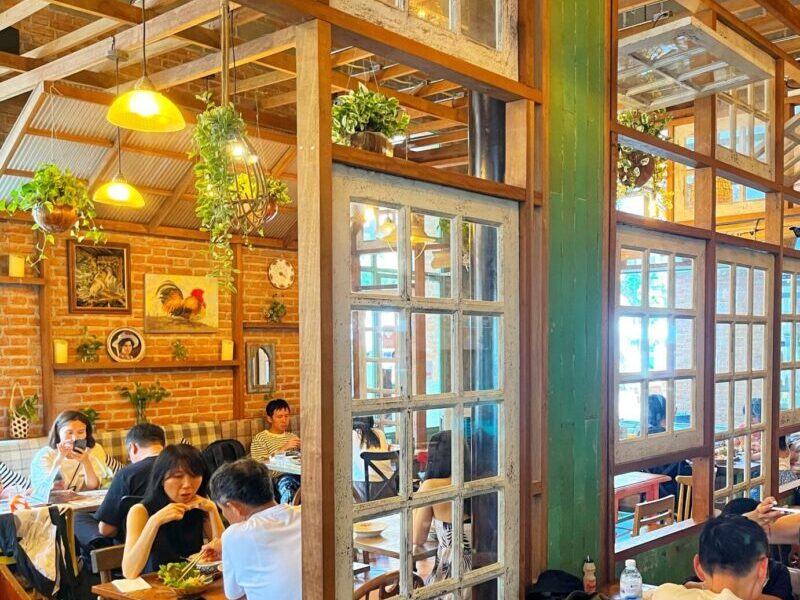
Northern Thailand Food Restaurant
If you’re looking for the best place to try various Northern Thai dishes for your meal in Chiang Mai, there are easily many great restaurants worth recommending. Here are some of our best discoveries whilst trying the various local restaurants in Chiang Mai.
Ginger Farm Kitchen
Ginger Farm Kitchen is on every “must-eat” list in Chiang Mai Food Guide. As soon as you arrive, you’ll realize how popular it is from the long queue of people waiting to have their meal here. The restaurant is rustically furnished and dotted with plants. It embraces a farm-to-table concept using organic and seasonal vegetables.
There are large choices of food offered here at reasonable prices. From the one-person dish, veggie-friendly menu, Thai dishes, and some of the unique dishes – all without MSG. The northern dishes are one of the best we’ve tried in Chiang Mai!
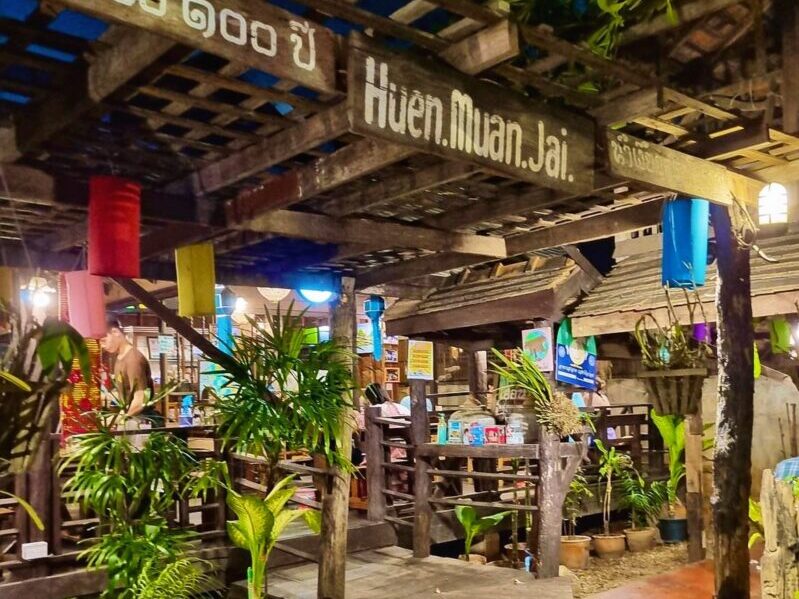
Huen Muan Jai is one of the trendier restaurants in Chiang Mai known for serving delicious Northern Thai dishes. The restaurant has an extensive menu including northern-style soups, grilled meats, stir-fries, chili dips, and more. It is a popular restaurant when looking for where to eat in Chiang Mai. Be prepared to wait during the peak hours of lunch and dinner.
Kiew Kai Ka One Nimman
Kiew Kai Ka has been awarded Michelin 5 years in a row since 2018. Their Chiang Mai Branch is a very beautiful, petite restaurant located in a busy One Nimman Shopping Centre. It is an excellent restaurant serving an amazing array of northern Thai dishes. The service and presentation of food and drinks are outstanding. Everything tasted fresh and delicious. We enjoyed our meal tremendously.
Chiang Mai Street food
Chiang Mai street food is real and is something you must eat in Chiang Mai. This is a city that takes the phrase “street food” seriously – food is everywhere. Many food stalls and street food vendors stretch along the streets at morning market or night market. Stalls are run by friendly locals cooking up a storm with their delicious fresh produce.
As you’d expect, there are loads of street-food options to try. The food is cheap but it has so many variables to try on. Bring more cash and an empty stomach to the market so you can try as much as possible!
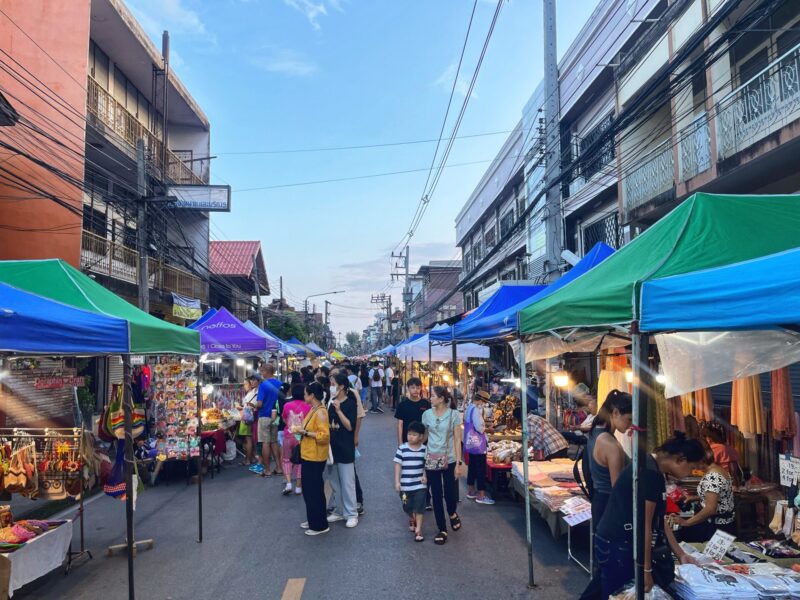
Chiang Mai Saturday Night Market (also known as the Wualai Walking Street) is another lively and fun night market that takes place every Saturday evening from 16:00 pm to 22:30. It is the smaller size of Sunday Night Market, but still, it is so huge with thousands of street vendors selling along the street.
Chiang Mai Sunday Night Market Walking Street, also known as Tha Pae Walking Street, is easily the most popular night market experience in Chiang Mai. You’ll find a huge variety of handicrafts, souvenirs, artwork, and of course, street food to sample here! If you get Sunday in your days here, then you must not miss this excellent night market.
Jing Jai Farmers Market (JJ Market) Chiang Mai is a famous open-air market that combines the farmer’s market, organic market, flea market, and creative craft market in the same area. The JJ market prides itself in its range of fresh and organic produce and environmental credentials. You could also buy local food, sit and relax in the small canteen or under the trees while enjoying the live music from the local musicians. The market runs every Saturday and Sunday from approximately 6.30 to 13:00.
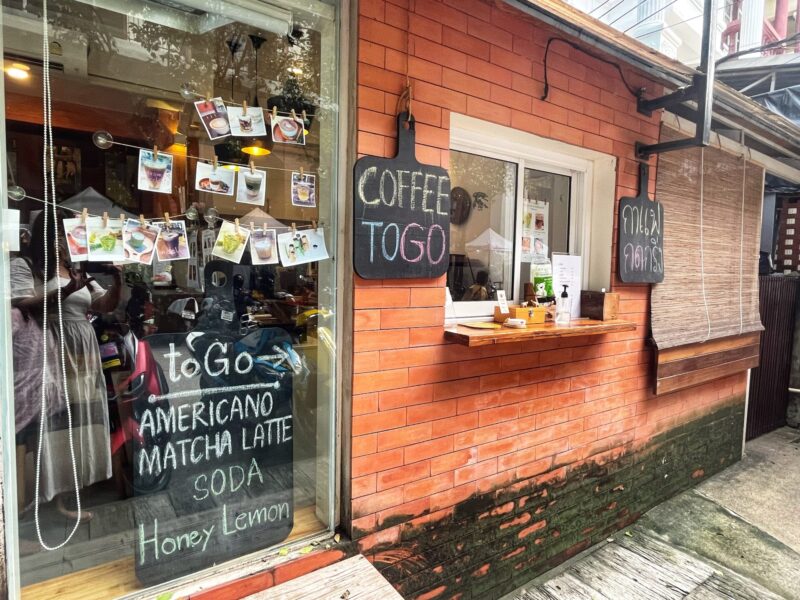
Coffee in Chiang Mai
Chiang Mai has a thriving coffee scene with a wide range of cozy coffee shops serving a nice cup of coffee. There are many recommended places for relaxing and sipping your favorite beverage, especially in the Nimman area.
Here are some of the recommendations for where to drink coffee in Chiang Mai.
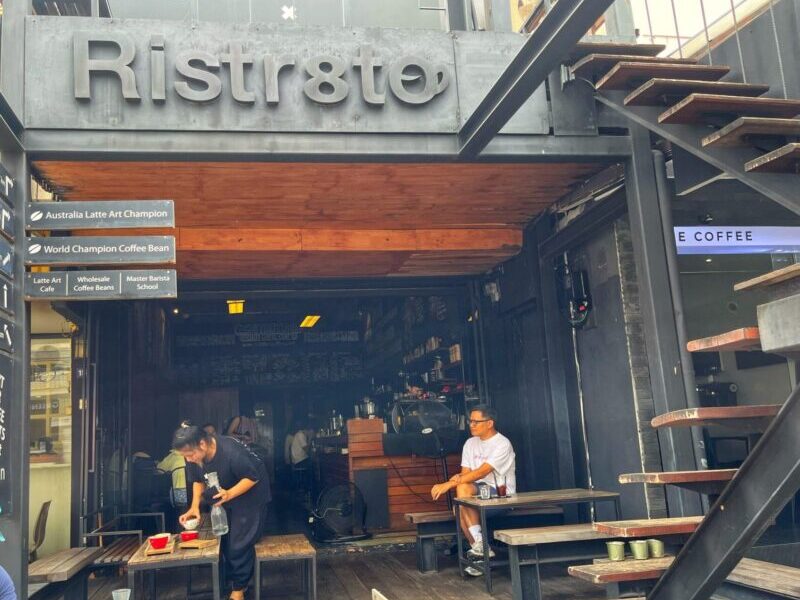
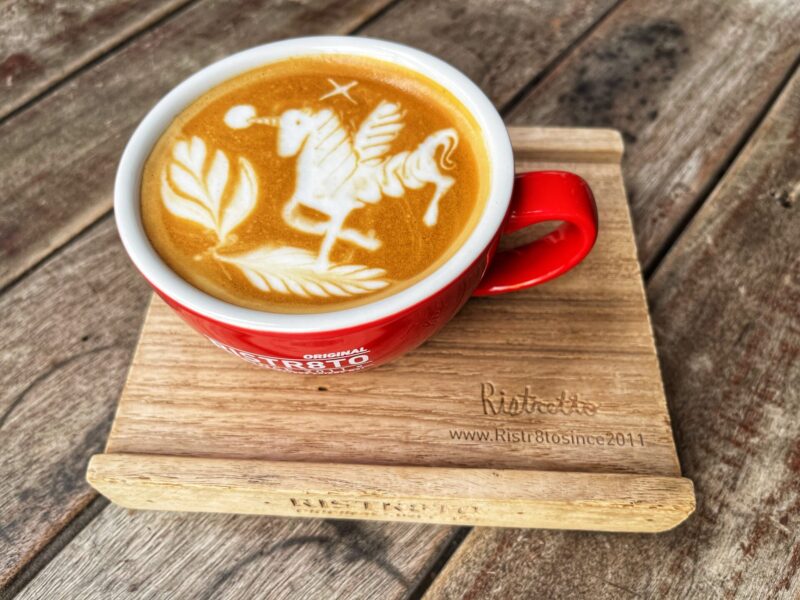
Ristr8to is an award-winning coffee shop known for serving some of the very best coffee in Chiang Mai. The coffee shop served some incredible coffee and cold-brew creations specialty coffee that made from beans sourced from different parts of the world.
The specialty coffee from Ristr8to including Satan Latte, Godmother Mocha, and Shakerato from Hell are popular among the locals.
Graph Ground at Nimman Area
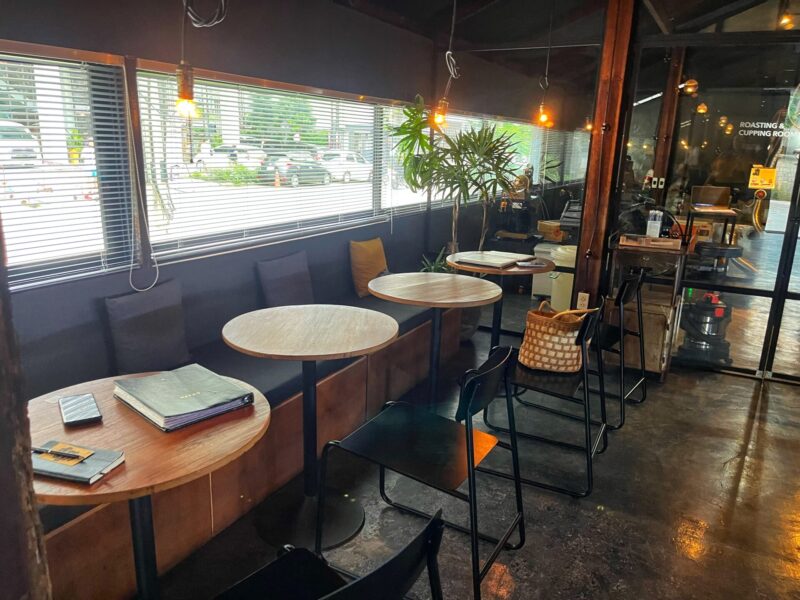
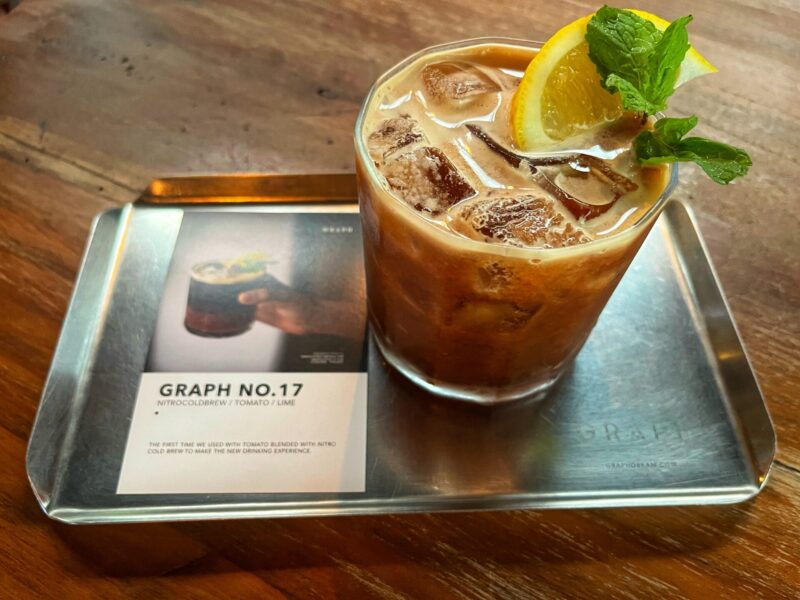
Graph Cafe Chiang Mai is a great coffee shop to sit, enjoy, and be treated to fantastic coffee menu choices. They served special coffee with original flavors history. Most of the coffee beans are from the Northern Thai coffee region.
A great place to sip the coffee and relax. Graph Cafe has a few branches in Chiang Mai, get the one near you. We went to Graph Ground at Nimman Area.
More Chiang Mai Food Tips
What are the top 3 must-eat foods in Chiang Mai?
Some of the must-eat food in Chiang Mai are Khao Soi (Chiang Mai curry noodles), Sai Oua (Northern Thai Spiced Sausage), and Nam Prik (Thai Chili Dips).
What is Chiang Mai’s signature dish?
Khao Soi is an iconic Northern Thai dish that must-try for everyone Chiang Mai food guide. It is a simple yet extremely tasty noodle dish served in a creamy, curry-like sauce made with coconut milk.
Is Chiang Mai known for street food?
Chiang Mai is brimming with street food vendors selling deliciousness at affordable prices. There are many day market and night markets with thousands of street vendors selling offering their food in the market.
Overall: Best Food in Chiang Mai
All in all, we hope you enjoy our Chiang Mai food guide. There’s no shortage of wonderful food to eat in Chiang Mai, and food in northern Thailand is extremely affordable. Even the expensive meals at nice restaurants won’t break the bank.
In short, we’re happy to share some of the best food in this Chiang Mai food guide here and you could easily eat something different when visiting the city!
Did you enjoy this Chiang Mai Food guide? We have more Thailand travel stories to share for your holiday. Free feel to check it out.